Tuesday, November 2, 2010

LibreOffice / OpenOffice - Where did my 'Formatting' toolbar go?

The toolbars in LibreOffice / OpenOffice are unlocked by default.

Whilst this is great for usability, it makes it easy to lose a toolbar also.

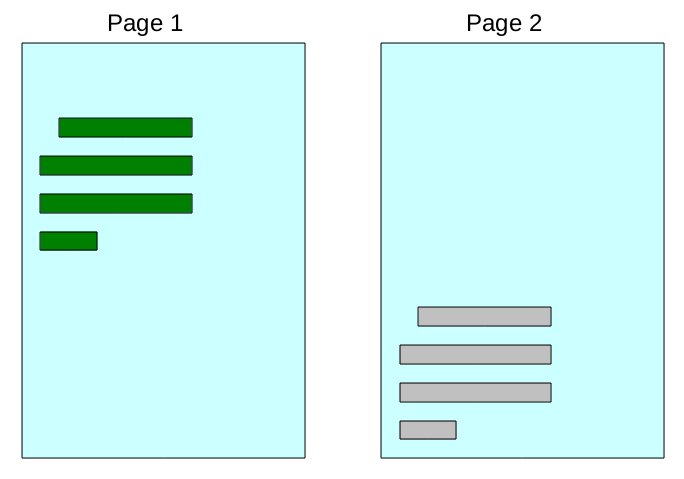
So you go into your application Writer and here is what you see:

When you would normally have above the "1 2 3 4 5" ruler something that mentioned Fonts and Font sizes???

...and here is what you are missing:


In most cases it is just a case of ticking the checkbox in View -> Toolbars -> Formatting
and hopefully it reappears.

But what if View -> Toolbars -> Formatting is already checked?


Well as toolbars are unlocked by default, it is all too easy to drag them off somewhere by mistake.
Maybe the family were around and little Bernard clicked on the Word Processor icon and had a little play around. Or perhaps you had your finger pressed on the mouse and somebody talked to you from the side.
It is easily done.

In my case, the toolbar had been moved to the right of the main toolbar and was not easy to see at first glance. But having located it, then it is just a case of dragging it back to where it should be (below the main "File | Edit | View" toolbar.

The little grabber  is marked as 5 horizontal lines on top of each other, and if you hover over it then you should see a four pointed symbol, which indicates that you are about to perform a move.


So you have used the grabber (shown above) and pulled the toolbar back to where you usually like to see it.


Locking toolbars - a must really:

I have used OpenOffice for many years, and have never felt the need to move toolbars about. However, I know some folks like to move them to be down the sides or whatever their preference is.

So for me personally, unlocked toolbars are a waste.

Unless you feel the need to move things about then I would recommend for each of the toolbars, that you 'Lock Toolbar position' as shown here:


To the right of each toolbar there should be a little icon which has an arrow at the base and is clickable.
When you click it then the drop down menu (shown above) should appear, and you should 'Lock Toolbar Position'

Having the toolbars locked, means you can leave the computer on, and little Bernard at the controls, and your toolbars will still be there when you check later :)


Ubuntu and LibreOffice / OpenOffice:

Ubuntu have their own desktop 'look and feel', which gets tweaked slightly with each release.
The default themes are pretty usable by my reckoning, however when the application themes are touched up to bring them into line with the desktop themes, then sometimes there is an oversight.

What I found when I used an Ubuntu Lucid machine recently, was that OpenOffice had been touched up to bring it into line with the desktop theme, and in the process the little grabber was either hard to see or missing.

To reiterate: If you are using Ubuntu and cannot find the little grabber (shown below)...

...then just grab a bit of greyspace where the grabber should be, and you should be able to move that way.

Whilst this is not ideal, it is the price you pay for using a Linux Distribution which puts a high priority on Desktop themes and consistent look and feel.

I prefer Debian, where the defaults do not involve tinkering with the Application look and feel, (although I am free to switch on a different application theme (say crystal) from within Writer itself)

Friday, October 29, 2010

LibreOffice / OpenOffice and repeating without 'cut paste'

Working on a recent document that involved some figures had me wondering how to have the same figures repeated.

I have used the Free Open Source Office Suite for 7 years, and wondered how to get the result without using 'Cut and Paste'

The particular section I will be repeating, is unusual in that it includes many numeric results, but not enough to really justify living in a separate spreadsheet.

Conceptually here is what I want:


One way to achieve this is to use Sections and the Navigator
( My icon looks more like a four pointed star. Compass or Star will do and hovering should say 'Navigator' )

Page2 in that concept diagram I show the repeated text in grey, as it is important that it is non-editable
( Just too easy otherwise to fall in and edit things in the wrong place! )


I list the steps involved and then run through with some screenshots:

  1. Insert -> Section          and give the section a name say 'Section1'
  2. Open Navigator and Right Click on 'Sections' to get a drop down menu
  3. From that drop down menu select 'Drag Mode' then 'Insert as Link'
  4. In your document move to where you want the copied section to go, and then drag 'Section1' from the Navigator into place.
  5. Right click the new entry in 'Sections' within Navigator and select 'Rename'. Make name Section1copy 
  6. Right click the new entry in 'Sections' and select 'Edit' and understand what the padlock symbols say


1. Insert -> Section

2 & 3 in Navigator:

6 ... padlock symbols:

If all went well then you should see something like the above. Section1 is unlocked (editable), whereas Section1copy is locked and will show as 'read-only' in the bottom status bar.


The quicker way of achieving the same result:

Having already created a section and populated it with the text which you will be repeating, just do Insert -> Section and check the 'link' checkbox.

It is not necessary to use the Navigator at all. However once you begin repeating sections and including links in your documents, then it is probably worth knowing your way around the Navigator feature.


The ultra fast way of achieving a similar result (Paste Special):

Copy and Paste but keep your finger on Shift when you Paste.

Select 'DDE link' from the 'Paste special' menu that pops up.


In order for the DDE link to work, a new Bookmark will have already been created in Navigator like so:


This type of link is marked 'soffice' internally and has details that look similar to the following example:


The advantage of using this 'Paste Special' DDE link way is speed obviously, and you do not have to create a Section around your text in preparation.

Where using Sections wins out is in complex documents, where perhaps you have repeated different blocks of text. Having the Sections clearly identified in Navigator can be a real win for that complex case.


Avoiding the startup 'Update all links' prompt:

Having setup a document with a repeated Section as described, you may then see this on opening your document:

And switching that off can be achieved in Tools -> Options -> Writer -> General


so that 'Update links when loading' is set to 'Always'


Deleting Sections and clearing up:

Use the Navigator and right click 'Edit' the section you want to remove.

Within 'Edit' you have a 'Remove' button which will do the trick.

Clearing up:
The text block I was copying was prepared as a table by me.

What I noticed was that removing the section did not delete the text copy itself, but merely reverted it to being 'standalone' typical text. A handy feature perhaps but do manually delete the text if that is not what you wish to be left with.


Links and further reading:

Sunday, July 11, 2010

Security first - pdfs and embedded files

A short posting with an example of the screenshot from a pdf reader ( Okular )

Pdf generators sometime include some of the settings for how the pdf was generated into the final pdf itself.

A security conscious pdf reader should give the user some information, rather than just rendering the embedded file:


When generating the pdf using a very feature rich Pdf Writer, there are many, many, options such as the CMYK profile.

Adobe Distiller likes to include a file named 'folder.options' (or similar) that contains entries like the following:
  • CompatibilityLevel 1.3
  • PDFXCompliantPDFOnly false
...and so on.

There is just one advantage I can see from having a copy of the embedded folder.options ...
...to see for yourself the compatibility settings which the author thought were
appropriate for the distribution of their published pdf.


Hybrid PDF/ODF export from OpenOffice:


Whilst on the subject of embedded files, I am running a recent version of OpenOffice (3.2) and noticed that pdf export has a new checkbox labelled 'Create hybrid file'

If you want maximum compatibility with people using open source AND adobe readers, then be wary of ticking 'Create hybrid file'.

Whilst it might seem convenient for yourself, I suggest you do some thorough testing with Adobe reader software before creating hybrid PDF/ODF files for wider distribution.


OpenOffice version 3 prior to version 3.2 and ColorSpace:

 If you have sent a pdf to a colleague and they have reported back they were unable to read it and their reader software reported 'invalid ColorSpace', then
consider running OpenOffice 3.2

( OpenOffice 3.2 was released in February 2010 and has better compatibility with the latest versions of Adobe reader )

OpenOffice 3.2 is the default version for the upcoming Debian Squeeze release.

Thursday, June 24, 2010

Opening Terminal with preset size / fixed geometry

There are many different terminal programs for Linux, and they all have some similar features.

I am familiar with Gnome terminal and Konsole, but choose Xfce terminal because I feel it is a closer match to my needs.


Opening Terminal with a fixed geometry:

--geometry=160x50

( Geometry in this context means the number of rows and columns )

The geometry I have given looks good on a 24" screen but smaller screen sizes might want to experiment with any of the following:

  • --geometry=80x24
  • --geometry=80x30
  • --geometry=80x40
In full you might enter something like the following in a panel item/command launcher:
'/usr/bin/xfce4-terminal' --geometry=80x24

Or for something that is more generic*, perhaps...
xfce4-terminal --geometry=80x24

*Depending on your Linux system, xfce4-terminal might alternatively be in /usr/local/bin/ or /opt/local/bin/

*The single quoting (') in command launchers, is something I see in Xfce, but do not recall seeing elsewhere.


Opening Terminal with fixed location:

For xfce4-terminal, I was able to set a default position by editing MiscDefaultGeometry in the file ~/.config/Terminal/terminalrc as shown in this diff:


To tell xfce4-terminal to have a default geometry of 160x50 and a default position of 150 pixels from the left, and 0 pixels from the top use:


MiscDefaultGeometry=160x50+150+0


Xfce Program Launchers:

In Xfce adding a 'New Item' to a panel brings up a selection list with 'Launcher' as the first entry.

Selecting 'Launcher' will bring up a screen like the following:


Here is one that my system has (and it uses exo-open):


The Command field contains:

exo-open --launch TerminalEmulator

...and there is no mention of xfce4-terminal (explanation later)

Here is the Launcher that I created for the Midori web browser:


Use startup notification (quoted directly from Xfce manual):
... means that the window manager can show an hourglass while the program is loading
( You might want to tick 'Use startup notification' on older systems with significant startup times )


What is this exo-open --launch about?:

Xfce has a 'preferred applications' system. It allows you to select your preferred application in 3 categories WebBrowser, MailReader, TerminalEmulator


I repeat again directly from the manpage for clarity:
--launch category parameters...
           Launch the preferred application for the given category with the optional parameters..., where category is either WebBrowser, MailReader or TerminalEmulator.

This preferred applications system is a bit like Debian update-alternatives but specifically for desktop preferences. Here is the control screen if you want to have a tinker with it:


...and the 'Utilities' tab now:


If you have not bothered setting your preferences, or want to bypass the preferences and simply call a particular browser, then there is no need then to bother with exo-open


Mnemonics - convenient or not - you decide:

If you find that commands/menu are being selected by mistake in your Terminal, it could be, that you have Mnemonics in GTK enabled and might prefer to switch them off.

ShortcutsNoMnemonics=TRUE

To read more about GTK and Mnemonics try this link.

The file ~/.config/Terminal/terminalrc is where you would set ShortcutsNoMnemonics

(This is an xfce4-terminal specific configuration option, I am sure there are ways of achieving the same in Gnome Terminal or similar )


Making changes to ~/.config/Terminal/terminalrc and future upgrades:

When upgrading your system to a new Linux release, it may be that a newer version of xfce4-terminal chokes on your terminalrc file ( It has happened to me in upgrading Ubuntu desktops )

Symptom: clicking xfce4-terminal launcher briefly flashes up the terminal but then it disappears

Solution: remove ~/.config/Terminal/terminalrc and retry


Gnome Terminal and Konsole:

Both of these terminal programs work well, and it may be that these are your favourite programs.

The great thing about weblogs is that anyone can write an article expounding their favourite Terminal program.

Rather than tell me how much better Gnome Terminal or Konsole are in your eyes, please instead write an article yourself and if you link to this article in it's comments, then I will happily reciprocate :)


Further reading and links:

Xfce4 manual section on Launchers (version 4.0 of Xfce)


Final tip for people who are wanting to remove Preferred Applications they may have set:


Setting a MailReader in Preferred Applications generates a file at...

~/.local/share/xfce4/helpers/custom-MailReader.desktop

If you no longer want any Preferred Application set for MailReader then perhaps...
...remove the custom-MailReader.desktop file.

Friday, June 4, 2010

When Raid mirroring just won't work - dd to the rescue

Having worked with many businesses on backup procedures, I try to adopt best practice on my own computers.

With this in mind, I have backup copies of entire hard drives which I refresh once or twice a year. This means that in the event of a critical failure, I can quickly grab the backup hard drive and put my main desktop pc back to the state it was in around 6 months ago.
     ( I back up business critical data using additional procedures than those discussed here )

Motherboards tend to have a raid controller, and raid mirroring procedure accessible in BIOS or startup screen.


With a similar sized disk I just select source and mirror and let the motherboard look after creating a backup (one time raid mirror). This always worked until recently* when I had to revert to using dd.


In defense of the 26 hours backup time, this is running dd via a system rescue usb stick on a 5 year old socket 754 motherboard, with SataI rather than SataII maximum throughput. Even so the 15.7 MB/s is shockingly slow, but for a one time job, then maybe that is not such a problem.

*Having bought two matching Samsung F2 1.5TB drives, I was surprised to find the Via onboard raid controller complaining that the drive sizes did not match. I can only assume that a 2005 raid controller, might not, in all cases, be good for properly recognising the huge terrabyte plus disks that we can buy today.


Using dd for Mirroring entire Partitions or Disks:

As demonstrated above, dd will do a job for you if your raid setup refuses to do a source -> mirror copy. Using modern hardware you should expect this to take a few hours.
[ using ancient hardware you will be there all day (literally) ]

If you prefer you can use dd for partition by partition mirroring, perhaps in my screenshot I might have used if=/dev/sda1 of=/dev/sdb1, so as to just copy the first partition.

Note: Doing things partition by partition, can be a bit more tricky, as you need to give thought to the partition structure on your output disk and if necessary create suitable partitions there prior to running dd.

Those who might prefer output to a file might like to consider of=/mnt/hugedisk/partition1.dd as a suitable parameter.

Documention for dd can be found in any of these places*:
  • For Debian and Ubuntu in /usr/share/doc/coreutils/
  • by typing in a terminal the command man dd
  • Manpage on the internet (gnu.org)
*Please make an effort to read the dd documentation above before making any comments on this article asking about how to use dd.

    Thursday, June 3, 2010

    Debian Squeeze - codependencies and circular dependencies

    Running Debian Squeeze on my desktop (before it is released), I find I am taking a closer look at the packages installed and their dependencies.

    It started as an effort to keep a minimal install, but as my desktop use has progressed, at 992 packages, my install is now hardly minimal.

    Package Codependencies:

    Perl (perl and perl-modules) gives a good example of a codependency.

    Here is a comment from a debian bug discussion which explains things somewhat

    The co-dependency between perl and perl-modules is required as these
    are fundamentally one package, split only into arch any/all parts.
    Modules within perl use modules within perl-modules and vice-versa.


    Python does not use this codependencies approach, but does have a package structure that also requires a bit of understanding when you first see it.


    Python (python and python-minimal), seem to be instead, set and subset, with the latter intended on being enough to support the initial install process, whilst not taking too much space on install media.

    These decisions are understandable when you remember that install media has a fixed size.

    ( This bartering, is perhaps similar to when you move house and have to discuss what goes where in the fixed size Ford Transit Luton/U-Haul )


    Python diagram (with a particular leaning towards my install packages):


    It is possible to install python 2.6 to python 3.1 in Squeeze, they are just not the default. There is not much relying on python 3.1 just now, except maybe if you wanted to beta test the latest Blender.

    (Aside: you will find libpython2.6 and libpython3.1 in Squeeze but there is no python 2.5 equivalent)

    Note: All version numbers checked in June 2010 which is likely 6 months or more ahead of Squeeze actual release. Version numbers are subject to change and may not be entirely accurate at and beyond Squeeze final release


    Package circular dependencies:

    libwrap0 and tcpd, on a server, are examples as illustrated by the diagram below:


    When I look at installed packages on servers, I see tcpd and think...how did that get there.

    The answer, of course, is that I have openssh-server installed, and, hopefully the diagram illustrates the rest.

    I use the term 'circular dependencies' very loosely in this posting, as the term 'circular dependency', it could be argued, more properly applies where both packages strictly depend on each other.

    Package confusing dependencies:

    In Squeeze gamin is supposed to be a drop in replacement for fam.

    I use the Thunar file browser and this diagram shows some interesting dependencies:


    seahorse-plugins is something I also use on the desktop and I found it useful to include it in the diagram.

    For libgamin0 to be a drop in replacement for libfam0, there would have to be changes to both of the vfs packages shown, so that either of libgamin0 or libfam0 could be used.

    I think gamin and libgamin0 are also codependencies (as it appears today in aptitude), but the thing that is confusing to me is how I could possibly install gamin.

    My thoughts are that if I try to install gamin or libgamin0 then it will break dependencies higher up :(


    There must be slightly more to it than I thought, because although I received a dpkg complaint, when replacing libfam0 with libgamin0, my system seems to be working without it wanting to remove thunar or seahorse-plugins :)

    Saturday, May 29, 2010

    Ati 3450 graphics and Debian Squeeze

    Booting into Debian Squeeze with the Ati 3450 graphics card gave me a workable display, but one that is far from ideal.


    Most Linux distributions will fall back to Vesa if they cannot determine an optimal configuration for your graphics card.

    The rest of this article contains much technical detail, but if you are running Debian you might just need to know that attempting to run

    apt-get install xserver-xorg-video-radeon

    ...should probably be replaced with the fuller command:

    apt-get install xserver-xorg-video-ati xserver-xorg-video-radeon


    But now for the detail....

    Looking at the chipset for this Ati 3450, I get some hints in the Xorg output, that are somewhat encouraging, saying that the PCI-E card is being detected:


     A quick read on Wikipedia shows that my card is indeed based on RV620 GPU although, physically, it looks a little different


    Seems to me that the problem is that my system is not choosing to use the 'radeon' driver.

    So first thing is to install radeon driver:

    apt-get install xserver-xorg-video-radeon

    which should install on your system some driver files:


    Now from reading some forum posts, some people suggest doing the following, but neither of these were of any help to me:

    • dpkg-reconfigure xserver-xorg
    • dpkg-reconfigure xserver-common

    Being that my system is an unstable or testing version of Debian, my expectation is that not everything will work just right from the outset.

    Now there is talk in forum about using either of the following to generate an xorg.conf which would supposedly then override systems own detection:
    • X -configure
    • Xorg -configure

    Both are binaries and my results from running both commands produced identical files at /root/xorg.conf.new
    ...and which you can view in this web directory.

    The important portion of that file is the driver line which is highlighted below:


    ...which looks correct.
    So at this point I am able get a good radeon xorg by using the -configure option, however my system is still choosing vesa when it runs.


    Notes about running X or Xorg with -configure and single user mode:

    If you really want an xorg.conf file to be generated, then you will have to stop X (if it is already running), otherwise your attempt to get an xorg.conf will fail.

    My way is to use Ctrl+Alt+F1 to get to a terminal, login as root, then issue

    telinit 1

    You might have your own way, but in any case, until you stop X (and lose graphical desktop temporarily), your X -configure command will surely fail.


    xorg.conf the Debian way - should I make changes here?:

    Debian /etc/ structures sometimes include a directory of pieces rather than single monolithic .conf files. This approach seems to be being adopted now for xorg.
    In particular this could provide a way of overriding sections of an automatic xorg configuration.

    See /usr/share/X11/xorg.conf.d


    Reading up a bit regarding the use of xorg.conf.d made me wary about putting pieces in that directory for device or screen.


    Review and new approach to a working 2D system using radeon driver:

    Back at the beginning when I installed xserver-xorg-video-radeon, I consulted aptitude and observed the following hierarchy:

    It occurred to me at the time, to install that whole bunch, but being minimalist, I just went for the radeon. Now I take the other approach...


    apt-get install xserver-xorg-video-ati

    which pulls in the 3 dependencies and gives a working result.

    Now (after rebooting) I have a working 2D display using the radeon driver (Xorg log output is here)

    What is good about this new situation is that I have 1920x1200 resolution:


    ...however, there is a noticeable drag delay whenever I move things about on the screen :(

    Reading up I see that there is a alternate radeon driver package xserver-xorg-video-radeonhd which I installed, and so my system now has both variants installed:


    ...which made absolutely no difference after rebooting. Makes sense I suppose that if I have both installed on my system then the one clearly labelled 'alternate' would not be favourite :)

    Having danced about a bit, let me take stock, and say that my situation is that I have a working 2D driver, but that what is missing is perhaps OpenGL acceleration.

    Leads me to this diagram to illustrate where I will seek a solution next:


    and issuing the following command (then rebooting):

    apt-get install libdrm-radeon1 libgl1-mesa-dri

    ...means that I can run glxgears and glxinfo now, but the noticable drag delay still remains.


    ...and 500 FPS from the open source driver, does not look too shabby, so why the lag? Here is glxinfo extract:


    ...but having installed driconf and run the thing, it seems to think my system is not dri capable:


    so I am no further along here.

    Sometimes following a hunch can win you the prize, and here is what I guessed to try...Turning ON display compositing

    which got rid of the lag when moving objects on screen.


    So now I have exactly what I wanted at the outset - a workable 2D display for my Ati 3450 graphics card, without having to resort to non-free (proprietary) software :)

    For clarity and to recap for my own benefit:

    I recommend the following command for Debian Squeeze Ati 3450 systems:

    apt-get install xserver-xorg-video-ati libdrm-radeon1 libgl1-mesa-dri

    If your Debian Squeeze Ati 3450 system appears to have a lag, when dragging objects, then turn ON display compositing.


    ( Note: If you are a gamer or are seriously concerned about the 3D performance, rather than just a workable desktop, then you will probably still want to go down the fglrx route )

    Wednesday, May 26, 2010

    screenshooter - 'Open With' and 'Copy to Clipboard'

    When taking screen shots, I tend to want to postprocess them immediately.

    Maybe a quick crop, or if the screenshot is to end up on blogger, choosing the jpeg output format (see notes at foot of this posting)

    This is why xfce4-screenshooter is my preferred screenshot tool


    ...as 'Open with' GIMP Image Editor is usually how I go about things.

    Here is the menu option for xfce4-screenshooter on Ubuntu Lucid:


    If you run Gnome rather than Xfce then, you will maybe, by default have Gnome screenshooter tool.


    ...which has 'Copy to Clipboard' in the dialog window, popping up, when you have clicked 'Take Screenshot'

    Using 'Copy to Clipboard', then from within GIMP, Edit -> Paste As -> New Image ... would also get your screenshot into GIMP for post processing. Just seems a slightly roundabout way when xfce4-screenshooter does it directly.

    Note: If you have both screenshot tools on your system, then you might want to 'Edit Menus' to adjust your Applications/Accessories menu to only display your favourite of the two :)


    Png and Jpeg for Blogger posting and resizing:

    When using blogger, i have little control over how the image is embedded in the page, other than selecting small, large, x-large, etc.

    I may be that google resizing process is less than ideal for .png files. Experience suggests
    to me that when using blogger jpeg images are not as badly affected by google resizing process.

    Having images appearing as grainy due to prepublication resizing just looks a little sloppy, and
    so until I understand more, it looks like I'll be using jpeg when posting to blogger. From the little bit
    of reading that I have done, it seems that Google really does have a leaning towards jpeg rather than png when you interact with Picassa and Blogger.


    Image viewers versus Image editors:

    I really am in the keep image viewers as image viewers only camp, when it comes to things like Eye of Gnome, or the feature creep that makes an image viewer into an image editor/photo manager.

    I recognise the desire to make things easy for the end user, but I tend to avoid Gthumb and F-Spot and things that supposedly 'manage' images, and instead select my own tools to get the job done.